[Vagrant]LAMP環境にSSL(オレオレ証明書)を入れてアクセスする方法
![[Vagrant]LAMP環境にSSL(オレオレ証明書)を入れてアクセスする方法](/upload-images/images/10/88f7bca14c76ca211c124e0963c41a0a3704e967.png)
2021年05月05日2023年10月10日
Vagrantで構築したLAMP環境にSSL(オレオレ証明書)を入れてアクセスする方法を紹介します。
まずはじめに
VagrantのLAMP環境を構築したい、これからという方は下記記事を参考に構築してみてください。
WindowsのVagrantにCentOS7.4を構築するする方法を紹介します。

Vagrantを使って本番環境に近いLAMP(CeontOS+Apache+Mysql+PHP...
SSLの設定
SSLのインストール
$ sudo yum -y install mod_ssl opensslディレクトリ移動
$ cd /etc/pki/tls/certs秘密鍵の作成(パスワードなんでもよい)
$ sudo make server.key秘密鍵からパスフレーズを削除する(先ほどのパスワードを入力)
$ sudo openssl rsa -in server.key -out server.key証明書の作成
$ sudo make server.csr

umask 77 ; \
/usr/bin/openssl genrsa -aes128 2048 > server.key
Generating RSA private key, 2048 bit long modulus
..................+++
.......................................................................................................................+++
e is 65537 (0x10001)
Enter pass phrase:
Verifying - Enter pass phrase:
[root@localhost certs]# openssl rsa -in server.key -out server.key
Enter pass phrase for server.key:
writing RSA key
[root@localhost certs]# make server.csr
umask 77 ; \
/usr/bin/openssl req -utf8 -new -key server.key -out server.csr
You are about to be asked to enter information that will be incorporated
into your certificate request.
What you are about to enter is what is called a Distinguished Name or a DN.
There are quite a few fields but you can leave some blank
For some fields there will be a default value,
If you enter '.', the field will be left blank.
-----
Country Name (2 letter code) [XX]:JP ←「JP」を入力
State or Province Name (full name) []:Okinawa ←都道府県を入力
Locality Name (eg, city) [Default City]:Naha ← 市町村を入力
Organization Name (eg, company) [Default Company Ltd]:Test ←「Test」を入力
Organizational Unit Name (eg, section) []:Test ←「Test」を入力
Common Name (eg, your name or your server's hostname) []:192.168.33.10 ←VagrantのIPを入力
Email Address []: ←入力せずEnter

Please enter the following 'extra' attributes
to be sent with your certificate request
A challenge password []: ←入力せずEnter
An optional company name []: ←入力せずEnter
有効期限が10年の自己証明書を作成する
$ sudo openssl x509 -in server.csr -out server.crt -req -signkey server.key -days 3650Apacheの設定
つぎにApache側の設定をおこないます。Virtual HostにSSLの記述を追加します。SSLの場合ポートが443となるので、80ポートの記述をコピーしてSSL用のVirtual Hostを作成する必要があります。
vi /etc/httpd/conf.d/vhosts-test.local.jp.conf/etc/httpd/conf.d/vhosts-test.local.jp.conf
<VirtualHost *:80>
    DocumentRoot "/var/www/test.local.jp/public"
    ServerName test.local.jp
    ErrorLog "logs/test.local.jpz-error.log"
    CustomLog "logs/test.local.jp-access.log" common
    <Directory "/var/www/test.local.jp/public">
       AllowOverride All
       Require all granted
    </Directory>
</VirtualHost>

# 上記の80ポートをコピーして下記を追記する

<VirtualHost *:443>
    DocumentRoot "/var/www/test.local.jp/public"
    ServerName test.local.jp
    ErrorLog "logs/test.local.jpz-error.log"
    CustomLog "logs/test.local.jp-access.log" common
    <Directory "/var/www/test.local.jp/public">
       AllowOverride All
       Require all granted
    </Directory>
    # 下記3行はそのままコピーして追記してください
    SSLEngine on
    SSLCertificateFile /etc/pki/tls/certs/server.crt
    SSLCertificateKeyFile /etc/pki/tls/certs/server.key
</VirtualHost>
Virtual Hostのconfファイル名やドキュメントルートはご自身の環境に書き換えてください。
Apacheを再起動
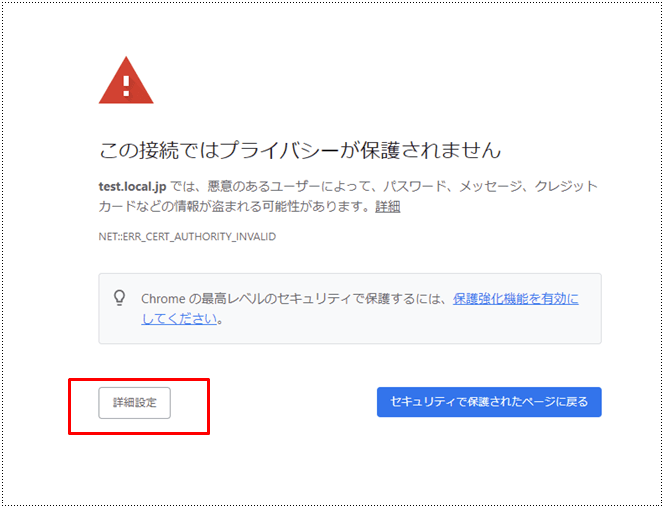
systemctl restart httpdWebブラウザからhttpsでアクセス。
警告が表示されたら「詳細設定」→「〇〇 にアクセスする(安全ではありません)」をクリックします。
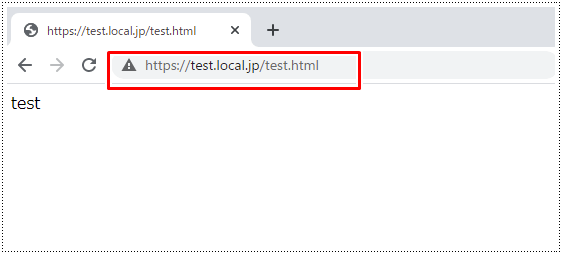
URLがhttpsでアクセス出来ているか確認してください。
SSLの設定は以上になります。


![[Eclipse]テキスト・ファイル・エンコードでShift-JISを指定する方法](/upload-images/images/20/995b5de453e899aa6b7150a11e41f0b6a693f458-thumbnail.png)
コメント
コメントを残す